Saturday, May 10, 2008

Where Is Turkey? (A Search And Discover Lesson)

Objective:

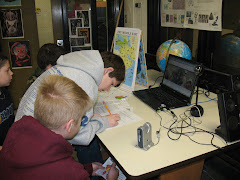
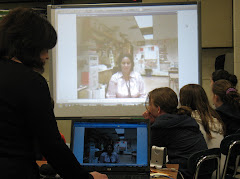
  • Working in small groups of 8, Miss Avery and Mrs Kopecki's classes students will collaborate remotely through videoconferencing technology on a Search and Discover Turkey session. In the process they will:


  • locate Turkey on a map of the world and determine its location in relation to the Middle East, Europe, Asia and Connecticut.

  • identify and locate specific geographical regions and features of Turkey.

CT Social Studies Content Standard:

Geography-to explore the physical and cultural characteristics of places and world regions and how those characteristics affect people.

Lesson Length: One class period

Materials:

  • 1 Map of Connecticut

  • 1 map of The Middle East

  • 1 Map of The World

  • 1 Search and Discovery Sheet

  • Pencils and Pens

  • Colored Pencils
Procedure:

1) Working in groups of four, (four six graders/four eight graders) the group leader will print ONE copy of the following: (This could be done ahead of time).


2) Your first task is to locate and label the approximate locations of Prospect, CT and Wethersfield, CT on the Connecticut map. Use may use this Connecticut Map to help. Share your locations with each other.

3) Your next task is to color the United States and Turkey on the world map. Share your maps with your partner groups.

4) Next, your groups will use this Interactive Middle East Map or the flip chart Atlas of the World to locate, label and color the following countries onto your map of the Middle East.


  • Turkey

  • Jordan

  • Saudi Arabia

  • Lebanon

  • Israel

  • Iraq

  • Iran

  • Egypt

  • Kuwait

  • Syria

  • Bahrain

  • Qatar

  • United Arab Emirates

  • Oman

  • Yemen
4) Lastly, your group will read Turkish Odyssey and complete the Seach and Discover Sheet about Turkey. Read the "About Turkey" introduction page as well as Geography and Population to help you find the answers to your questions.


Concluding Activity

  • Discussion Question: Compare and contrast the geography of Turkey with the geography of the United States. Share you responses with your videoconferencing partners.

To test your memory of the countries in this region after completing the lesson try the map at:

http://rethinkingschools.org/just_fun/games/mapgame

Monday, May 5, 2008

Islamic Art, Religion and Culture


Grade Level
grades 6-8

Anticipated Time Period
Two one hour lessons

CT ART State Standards
Content Standard 3: Content
Students will consider, select and apply a range of subject matter, symbols and ideas.
Content Standard 4: History and Culture
Students will understand the visual arts in relation to history and culture

CT Social Studies Content Standard: Culture
All world religions and belief systems have geographic origins and founding leaders, principles, and teachings.

Contacts among different cultures led to changes in belief systems, art, science, technology, language, and systems of government.

The early Arab, African, Chinese, European, Greek, Indian, Roman, and American civilizations contributed significant cultural and scientific legacies.

Lesson Goal
Students will understand the connection between Islamic Art, culture and religion by exploring the Middle East.

Objective
Students will identify the Five Pillars of Faith.
Students will recognize the symbols used in Islamic Art

Materials
PowerPoint on ‘Islamic Art, Religion and Culture'

Question Sheet on Powerpoint Presentation
Activity sheet on the Five Pillars of Faith
Pencils, crayons, colored pencils, markers

Motivation/Initiation
Teacher will share PowerPoint presentation on ‘Islamic Art, Religion and Culture’
Class discussion on Five Pillars of Faith
View slides of’ Islamic Art and Culture’(National Gallery of Art)
Take a virtual tour the Suleymaniye Mosque (DVD-Saudi Aramco WORLD)

Procedure
1) The classes will view remotely a PowerPoint presentation of 'Islamic Art, Religion and Culture' followed by a joint class discussion.

Click on this link to view the powerpoint: Islamic, Art Religion and Culture

2) The teacher will project the ‘fill in the blank’ questions on the board (or distribute hardcopy to the students) and students will remotely answer and discuss the questions as a joint class discussion.


3) Give each student a copy of the ‘Five Pillars of Faith’ and have them complete the art activity sheet on the ‘Five Pillars of Faith’, using markers, crayons or colored pencils.

Link for Activity sheet of Five Pillars:
http://www.crayola.com/free-coloring-pages/print/five-pillars-of-islam-coloring-page/

Extension Activity Assessment
Students will share their art activity sheet ‘Five Pillars of Islam’ with classes and teachers remotely (through videoconferencing) and will create a bulletin board of their ideas.

Thursday, May 1, 2008

Math Connections/Geometry and Islamic Tiles


Objective: to explore in a hands on manner geometric concepts related to tile design in Turkey and all of the Islamic world using animal, floral or geometric motifs.


Grade Level: 6th -8th


CT Math Standards: Geometry and Measurement

Identify lines of symmetry and reflections, rotations and translations of geometric figures.

Identify polygons that have line and/or rotational symmetry

Use a coordinate plane to make and test conjectures about changes in the coordinates of the vertices of polygons as a result of a transformation (translation and/ or reflection) and describe the results in writing


Materials:

Wooden Pattern Blocks
Protractors
Rulers
Rigid Plastic Mirrors
Copy Paper
Tracing Paper
Mirrors Template
Markers

Examples of Islamic Tile Designs

Time Frame:

Two 60 minute periods

Procedure:

1. Going to the Transformations In Math website, the teacher will remotely lead a review of the three basic types of transformations ( reflections, rotations, and translations).

2. Going to Symmetry Is All Around Us website, the teacher will lead a review of the types of symmetry. Next, using this image of Iznik Tile from Turkey's Topkapi Palace, the teacher will remotely lead a review with both classes of the types of symmetry seen in this Islamic design (rotational,line and point).


3. Activity # 1 Demonstrating Fold Symmetry

a. Using a protractor, the teacher will use mark a center point on a sheet of copy paper and make a 6 inch line of symmetry (mirror line) thus dividing the paper into two symmetric parts (2-fold symmetry). **The students should model the teacher through this demonstration.**

Ask: How many degrees are the measures of the two angles that are created? (180 degrees)

b. The teacher will next draw a second 6 inch perpendicular bisecting line through the center of rotation and divide the copy paper into four congruent parts (4-fold symmtery).

Ask: How many degrees are the measures of the four angles that are created? (90 degrees)

c. Students will use a protractor to divide a circle into 60, 45 and 30 degree angles and label the various fold symmetries (6-fold/8-fold and 12-fold symmetry).

4. Conclusion Day One/Introduction Day Two: Discuss with students how the Islamic artists used the geometry knowledge of geometry to produce beautiful works of art that demonstrated visually their vision of the universe (logical and orderly) as well as the unchanging laws of God.

6. Activity # 2 Creating Symmetrical Pattern Designs

a. Students will use a copy of the Mirrors template and the colored patterned blocks and rigid plastic mirror to explore various geometric patterns.

b. They will then select a pattern to reflect and rotate and copy that pattern onto the angle of their choice on the Mirrors Template.

c. Using a ruler and protractor, the students will then create a 6 X 6 inch square on a piece of tracing paper and divide the square into its appropriate folds depending on the angle chosen. (Stress that the angle will determine the type of fold symmtery they will have. Have them recall yesterday's activity on fold symmetry).

d. Using a marker they will next trace the design onto the tracing paper and REFLECT the design over one line of symmetry. They will then turn the tracing paper over and trace the design with the marker.

e. This process must be repeated over every line of symmetry until there is a completed geometric design.


Conclusion: Identify lines of symmetry and fold-symmetry as well as transformations used. have the students write down all the types of symmetry their design contains (line symmtery, rotational symmtery)