
Objective: to explore in a hands on manner geometric concepts related to tile design in Turkey and all of the Islamic world using animal, floral or geometric motifs.
Grade Level: 6th -8th
CT Math Standards: Geometry and Measurement
Identify lines of symmetry and reflections, rotations and translations of geometric figures.
Identify polygons that have line and/or rotational symmetry
Use a coordinate plane to make and test conjectures about changes in the coordinates of the vertices of polygons as a result of a transformation (translation and/ or reflection) and describe the results in writing
Materials:
Wooden Pattern Blocks
Protractors
Rulers
Rigid Plastic Mirrors
Copy Paper
Tracing Paper
Mirrors Template
Markers
Wooden Pattern Blocks
Protractors
Rulers
Rigid Plastic Mirrors
Copy Paper
Tracing Paper
Mirrors Template
Markers
Examples of Islamic Tile Designs
Time Frame:
Two 60 minute periods
Procedure:
1. Going to the Transformations In Math website, the teacher will remotely lead a review of the three basic types of transformations ( reflections, rotations, and translations).
2. Going to Symmetry Is All Around Us website, the teacher will lead a review of the types of symmetry. Next, using this image of Iznik Tile from Turkey's Topkapi Palace, the teacher will remotely lead a review with both classes of the types of symmetry seen in this Islamic design (rotational,line and point).

3. Activity # 1 Demonstrating Fold Symmetry
a. Using a protractor, the teacher will use mark a center point on a sheet of copy paper and make a 6 inch line of symmetry (mirror line) thus dividing the paper into two symmetric parts (2-fold symmetry). **The students should model the teacher through this demonstration.**
Ask: How many degrees are the measures of the two angles that are created? (180 degrees)
b. The teacher will next draw a second 6 inch perpendicular bisecting line through the center of rotation and divide the copy paper into four congruent parts (4-fold symmtery).
Ask: How many degrees are the measures of the four angles that are created? (90 degrees)
c. Students will use a protractor to divide a circle into 60, 45 and 30 degree angles and label the various fold symmetries (6-fold/8-fold and 12-fold symmetry).
4. Conclusion Day One/Introduction Day Two: Discuss with students how the Islamic artists used the geometry knowledge of geometry to produce beautiful works of art that demonstrated visually their vision of the universe (logical and orderly) as well as the unchanging laws of God.
6. Activity # 2 Creating Symmetrical Pattern Designs
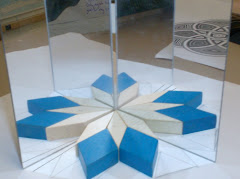
a. Students will use a copy of the Mirrors template and the colored patterned blocks and rigid plastic mirror to explore various geometric patterns.
b. They will then select a pattern to reflect and rotate and copy that pattern onto the angle of their choice on the Mirrors Template.
c. Using a ruler and protractor, the students will then create a 6 X 6 inch square on a piece of tracing paper and divide the square into its appropriate folds depending on the angle chosen. (Stress that the angle will determine the type of fold symmtery they will have. Have them recall yesterday's activity on fold symmetry).
d. Using a marker they will next trace the design onto the tracing paper and REFLECT the design over one line of symmetry. They will then turn the tracing paper over and trace the design with the marker.
e. This process must be repeated over every line of symmetry until there is a completed geometric design.
Conclusion: Identify lines of symmetry and fold-symmetry as well as transformations used. have the students write down all the types of symmetry their design contains (line symmtery, rotational symmtery)


1 comment:
I think it's cool that the Islamic art uses so many patterns and so much symetry.
Post a Comment